
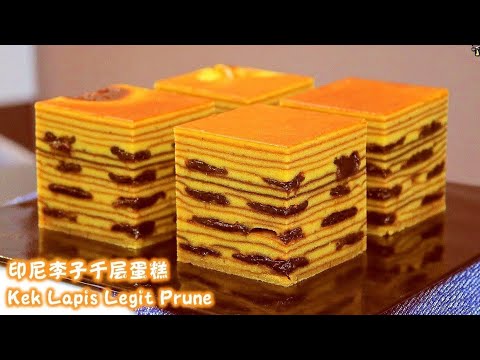
Kue lapis is a soft, steamed Indonesian cake made of thin, alternating layers. Rice flour gives it body, tapioca flour brings its characteristic gentle chew, and coconut milk makes each slice rich and fragrant.
This version uses pandan for a green layer and vanilla for a simple pale layer. The batter is easy to pour, and steaming each layer before adding the next helps the colors stay distinct while the cake cooks through.
Why This Recipe Works
Rice flour and tapioca flour have different jobs. Rice flour gives the cake a tender, cohesive structure; tapioca flour makes the layers elastic and pleasantly chewy. Using both keeps the cake from being either crumbly or overly gummy.
The batter is mixed with coconut milk rather than water, so it carries flavor and richness through every layer. Dissolving the sugar in gently warmed coconut milk also prevents grainy patches and helps the ingredients blend evenly. The milk should be warm, not hot, before it meets the flour.
Steaming the layers in sequence is the key to the striped appearance. Each layer needs to become set enough to support the next pour, but it should not dry out. A covered steamer keeps the heat steady; a cloth under the lid catches condensation so water does not spot or wash the surface of the cake.
Ingredients
- 250 g rice flour
- 250 g tapioca flour
- 1 liter coconut milk
- 300 g granulated sugar
- 1 tsp salt
- 1 tsp pandan extract, or 1 tsp green food coloring if pandan extract is unavailable
- 1 tsp vanilla extract
- 2 tbsp cooking oil, for greasing the pan
Ingredient Notes
Rice flour: Use plain, finely milled rice flour, not glutinous rice flour. Glutinous rice flour behaves differently and would make the cake much stickier and denser.
Tapioca flour: Also sold as tapioca starch, it provides the supple, springy texture associated with kue lapis. Do not replace it with cornstarch if you want that characteristic chew. If tapioca is unavailable, a starch substitute may make a cake, but its texture will not be the same.
Coconut milk: Full-fat canned or fresh coconut milk gives a rounded flavor. Shake or stir it well before measuring, since the thicker cream can separate from the thinner liquid. A lighter coconut milk can be used, though the result will be less rich. Avoid sweetened coconut beverages, which can change both the sweetness and texture.
Pandan and vanilla: Pandan extract gives the green layers their distinct aroma as well as color. Green food coloring will provide color but not pandan flavor. Vanilla flavors the pale layers; if you do not have it, leave it out rather than adding another strong flavor.
Sugar, salt, and oil: Granulated sugar sweetens the cake and dissolves readily in warm coconut milk. Salt sharpens the coconut flavor. Use a neutral cooking oil to coat the pan lightly; too much oil can leave slick patches on the cake.
Instructions
- Set up the steamer. Pour water into a steamer or a large pot fitted with a rack, keeping the water below the rack. Bring it to a steady boil, about 100°C at sea level. Wrap the lid in a clean kitchen towel and secure the ends away from the flame or heating element. The towel catches condensation; keeping the water at a steady boil provides even steam. No oven is used for this recipe.
- Prepare the pan. Lightly coat the inside and sides of an 8-inch square, heatproof pan with cooking oil. Set the pan on the rack and steam it for 3 minutes. It should be hot when the first batter goes in, which helps that first layer begin setting evenly. Carefully lift the pan out with oven mitts or a folded towel.
- Warm the coconut milk. Put the coconut milk, sugar, and salt in a saucepan over low heat. Stir for 3–5 minutes, just until the sugar dissolves and the mixture feels warm. Do not let it boil; boiling can make the coconut milk separate and would make the mixture too hot to combine smoothly with the flour. Set it aside to cool until comfortably warm.
- Mix and strain the batter. Whisk the rice flour and tapioca flour together in a large bowl. Gradually whisk in the warm coconut milk mixture, adding it in several pours and scraping the bottom and corners of the bowl. Continue until no dry pockets or large lumps remain, then strain the batter through a fine sieve. A smooth, pourable batter will give the layers an even texture. Let it stand for 10 minutes so bubbles can rise.
- Flavor and color the batter. Stir the batter again, since flour can settle while it rests. Divide it evenly between two bowls. Stir the pandan extract into one bowl and the vanilla into the other. The pandan bowl should be evenly green; the other should remain pale. If using green food coloring instead, add it gradually until the color is even. Stir both bowls before measuring each pour because the flour settles quickly.
- Steam the first layer. Return the hot pan to the steamer. Pour in one thin, even portion of the pale batter, tilting the pan gently if needed to cover the base. Cover and steam for 5–7 minutes. The surface should look matte and set rather than wet or glossy when touched lightly with a clean spoon. This firm base helps the following layers stay separate.
- Build the alternating layers. Pour an equal portion of green batter over the set layer, spreading it gently without scraping through the layer underneath. Cover and steam for 5–7 minutes, until the top is set and no liquid batter runs when the pan is nudged. Repeat with alternating pale and green portions, stirring the bowls before each pour. Keep each layer similar in thickness so the cake cooks evenly; if a layer still looks wet, give it another minute before adding the next.
- Finish steaming. After the last layer is added, cover the pan and steam for 20 minutes. The top should be set, and a thin skewer inserted into the center should come out without wet batter. If it does not, steam for another 5 minutes and check again. Keep the steamer supplied with hot water during cooking; do not allow it to boil dry.
- Cool before cutting. Lift the pan out and let the cake cool in the pan until completely cool, about 2 hours. Cooling firms the tapioca-rich layers, making them easier to unmold and slice cleanly. Run a lightly oiled knife around the edge, turn the cake out, and cut it with a lightly oiled knife or a clean plastic knife. Wipe and re-oil the blade between cuts for neater stripes.
Servings: about 8–10. Prep time: 20 minutes. Cook time: about 1 hour 20 minutes. Total time: about 1 hour 40 minutes, plus cooling.
Tips for Success
- Stir before every pour. Rice and tapioca flour settle quickly. A few strokes from the bottom of each bowl help keep the batter consistent from the first layer to the last.
- Keep the layers thin and even. Uneven pours can leave some parts cooked while others stay soft. Use the same ladle for each layer and pour into the center, letting the batter spread.
- Watch the surface, not only the clock. Steamer strength and pan material vary. Add the next layer only when the current one looks set and is no longer wet on top.
- Keep the lid on. Frequent peeking lets steam escape and slows cooking. If you need to check a layer, lift the lid briefly and replace it promptly.
- Prevent condensation drips. A towel secured around the lid catches water. Keep its ends well away from any flame or heating element.
- Use a light touch with oil. Grease the pan evenly, but wipe away visible pools. A thin coating helps release the cake without making its edges oily.
- Let it cool fully. Warm kue lapis is very soft and can compress under a knife. Waiting until it is cool makes the layers easier to see and handle.
Troubleshooting
The layers blend together. The previous layer was probably still wet when the next one went in, or the new batter was poured too forcefully. Steam each layer until its surface is set, then pour slowly over it. Avoid pressing or dragging a spoon across the surface.
The cake has hard or dry edges. The pan may have been exposed to strong, uneven steam, or the layers may have cooked too long before the next pour. Keep the steam steady rather than excessively vigorous, and use the visual cue as well as the suggested time. Check that the lid fits and that the pan is not sitting too close to the steamer’s sides.
The center seems undercooked. The pan may be deep, the layers too thick, or the steam too weak. Continue steaming in 5-minute increments until the center is set and a skewer shows no wet batter. Make sure the water is boiling steadily and has not run low.
The texture is gummy or pasty. A cake that is cut while warm can seem much stickier than it will once cooled. If it is already cool and still pasty, the batter may have been measured inaccurately or the cake may need more steaming. Weigh the flours if possible and check the center before removing the pan.
The colors look uneven. Flour settling can make the last portions of batter thicker and duller. Stir each bowl thoroughly before every pour, and use pandan extract or coloring evenly rather than adding it to the pan.
The cake sticks to the pan. The pan may not have been greased all over, or the cake may still be warm. Let it cool completely, loosen the sides with an oiled knife, and turn it out gently. Next time, grease the corners and sides as well as the base.
Variations
For a more pronounced pandan flavor, use pandan extract rather than plain green food coloring. The coloring-only version still gives a clear striped appearance, but it will taste primarily of coconut and vanilla. Add color sparingly so the green remains appealing without affecting the batter’s flavor.
You can make the cake in two colors, as written, or use a single color for every layer. For a three-color cake, divide the batter into three bowls and flavor or color them separately, keeping the portions equal so the layers remain consistent. Add only small amounts of any coloring or extract; too much liquid can affect the batter.
A round, heatproof pan can be used instead of a square pan if it fits comfortably in the steamer. The shape changes the appearance, not the basic method. A different pan may change the depth of each layer, so rely on the set-surface cue and allow extra steaming time if a layer is thicker.
What to Serve With It
Kue lapis is usually satisfying as a small sweet on its own. Serve it at room temperature with unsweetened tea or coffee, which balances its coconut richness without competing with the pandan and vanilla. It also works well as part of a dessert spread with fresh fruit or other lightly flavored sweets.
Cut small pieces with clean, oiled strokes so the layers remain visible. The cake is soft and chewy, so it is easier to pick up once it has cooled fully. If serving it later, keep the pieces covered so the cut surfaces do not dry out.
Make-Ahead, Storage and Reheating
Kue lapis is a good make-ahead dessert because it needs to cool fully before slicing. Once cool, wrap the whole cake or individual portions tightly, or place them in a covered container. Refrigerate within two hours of cooking. Properly refrigerated leftovers keep for three to four days.
For longer storage, wrap portions well and freeze them in a freezer-safe container for up to two months for best texture. Thaw in the refrigerator, still wrapped, so moisture does not collect on the cake’s surface. Do not leave the cake at room temperature for extended storage.
The cake can be eaten chilled or brought to room temperature. To warm a portion, steam it briefly until just soft, or microwave it in short bursts under a loose cover. Stop as soon as it is warm; prolonged heating can make the tapioca layers overly soft and sticky. If reheating a portion, heat only what you plan to serve.
Frequently Asked Questions
Is kue lapis baked?
No. This recipe is steamed, not baked. The gentle, moist heat cooks the batter in thin layers and gives the finished cake its soft, springy texture.
Can I use glutinous rice flour instead of rice flour?
Not as a direct substitute. Glutinous rice flour has different thickening and texture properties, so it can make the cake much stickier and heavier. Use plain rice flour for the intended result.
Can I make this without pandan extract?
Yes. Use green food coloring if you want green stripes, though the cake will not have pandan’s aroma. You can also leave out the green color and make pale layers flavored with vanilla.
Why do I need to stir the batter so often?
The flours settle to the bottom while the batter stands. Stirring before each pour brings them back into suspension and helps every layer cook with a similar texture.
How do I know when a layer is ready for the next pour?
Look for a surface that has turned matte and set, with no liquid batter running when the pan is nudged. If the top is still glossy or moves like liquid, steam it a little longer.
Can I use a different pan?
Yes, provided it is heatproof and fits inside your steamer with room for steam to circulate. A different size changes layer thickness, so the cooking time may shift; use the set surface as your guide.
Why is my cake difficult to slice neatly?
It may still be warm, or the knife may be dragging through the sticky layers. Let the cake cool completely and use a lightly oiled knife, wiping it clean between cuts.
Can I make the layers ahead and finish the cake later?
It is best to steam the layers in one continuous session, adding each new portion while the previous surface is set. Once the whole cake is cool, you can store it covered in the refrigerator or freezer.