
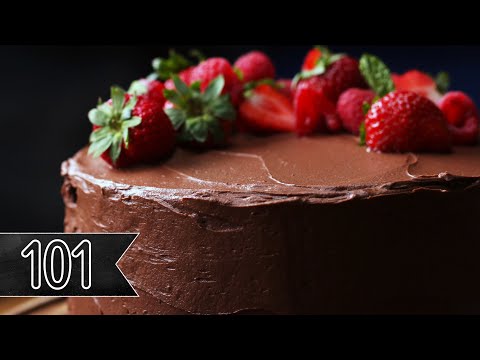
This is a two-layer chocolate cake with a soft, tender crumb and a deep cocoa flavor. The batter is quick to mix by hand, and the finished cake is easy to dress up with a simple chocolate buttercream.
Hot water blooms the cocoa and makes the batter thin, which helps the cake bake up moist rather than dense. Expect a balanced chocolate taste, gentle sweetness, and a smooth frosting that makes each slice feel like a proper celebration.
Why This Recipe Works
Oil keeps the crumb moist and tender, even after the cake has been chilled. Unlike butter, oil stays liquid when cool, so refrigerated slices do not become as firm. Whole milk adds moisture and a little richness without making the cake heavy.
The combination of baking powder and baking soda gives the layers lift. Baking soda also reacts with the natural acidity in cocoa, while baking powder provides additional leavening. Measure both carefully; extra leavener can make the cake rise quickly and then sink.
Boiling water is stirred in at the end. It loosens the batter and helps cocoa release its flavor. The batter will look much thinner than a typical butter cake batter. That is expected: pour it carefully into prepared pans, and avoid adding extra flour to thicken it.
Finally, mixing the dry ingredients before adding the wet ones helps distribute the leaveners evenly. Once the flour goes in, mix only until the batter is smooth. Too much mixing can develop gluten and make the finished crumb tougher.
Ingredients
- 1 ¾ cups all-purpose flour, spooned into the measuring cup and leveled
- 1 ¾ cups granulated sugar
- ¾ cup unsweetened cocoa powder
- 1 ½ teaspoons baking powder
- 1 ½ teaspoons baking soda
- 1 teaspoon fine salt
- 2 large eggs, preferably at room temperature
- 1 cup whole milk
- ½ cup neutral vegetable oil
- 2 teaspoons vanilla extract
- 1 cup boiling water, or hot brewed coffee
- 1 cup unsalted butter, softened, for the frosting
- 3 cups powdered sugar, for the frosting
- ½ cup unsweetened cocoa powder, for the frosting
- ¼ teaspoon fine salt, for the frosting
- 1 teaspoon vanilla extract, for the frosting
- 3 to 4 tablespoons milk, for the frosting
Ingredient Notes
Flour: All-purpose flour gives the cake enough structure to hold two layers without making it bready. Spoon it loosely into a dry measuring cup and level the top; packing flour into the cup can add too much. A 1:1 gluten-free baking blend may work, but results vary by blend.
Sugar: Granulated sugar sweetens the cake and helps keep the crumb soft. Do not reduce it substantially, since sugar also affects moisture and structure. Powdered sugar is used in the frosting because it dissolves smoothly.
Cocoa: Use unsweetened cocoa, not sweetened drinking chocolate. Natural cocoa is a dependable choice here. Dutch-process cocoa has a different acidity, so the cake may not rise quite the same way with the specified baking soda; for the most predictable result, use natural cocoa.
Leaveners and salt: Baking powder and baking soda are not interchangeable. Check that both are fresh, and measure level teaspoons. Salt sharpens the chocolate flavor; use a little less if using salted butter in the frosting.
Eggs, milk, and oil: Large eggs help bind the batter. Whole milk gives a tender crumb; 2% milk can be substituted, though the result may be slightly less rich. Use a neutral oil such as canola or sunflower. Melted butter can be used in the cake, but it firms as it cools and may make chilled slices less soft.
Boiling water or coffee: Hot liquid helps disperse the cocoa. Coffee deepens the impression of chocolate without making the cake taste strongly of coffee; boiling water keeps the flavor straightforward. Add it slowly to avoid splashing.
Frosting: Softened butter should give slightly when pressed but should not be greasy or melted. Add the milk gradually; humidity and the butter’s softness affect how much the frosting needs. You can use a few tablespoons of strong coffee instead of the milk for a more pronounced mocha note.
Instructions
- Prepare the pans and oven. Heat the oven to 350°F (175°C). Grease two 9-inch round cake pans, line the bottoms with parchment, and lightly grease the parchment. Set a rack in the center of the oven. The pans should be ready before mixing because the baking soda starts working once it meets the wet ingredients.
- Mix the dry ingredients. In a large bowl, whisk together the flour, sugar, cocoa, baking powder, baking soda, and salt until the color is even and no cocoa clumps remain. If the cocoa is lumpy, sift it first. Even distribution helps the layers rise uniformly.
- Add the eggs and other cool liquids. Add the eggs, milk, oil, and vanilla. Whisk or beat on medium-low just until the mixture is smooth, scraping the bowl once. The batter will be thick at this stage. Stop when there are no obvious streaks of flour; prolonged mixing can toughen the cake.
- Stir in the hot liquid. Carefully pour in the boiling water or hot coffee while whisking on low. Mix until combined. The batter will be very thin and glossy. This loose consistency is correct, so do not add more flour.
- Fill the pans and bake. Divide the batter evenly between the pans. Bake for 30 to 35 minutes, rotating the pans only if your oven has a hot spot and the layers are set enough to move. The cakes are done when the centers spring back lightly, the edges begin to pull from the pans, and a toothpick inserted in the center comes out with a few moist crumbs rather than wet batter. If it comes out coated in liquid batter, bake another 2 to 3 minutes and check again.
- Cool the layers. Set the pans on a rack for 10 to 15 minutes. Run a thin knife around the edges, then turn the cakes out and remove the parchment. Cool completely, about 45 to 60 minutes more. Warm cake can tear under the frosting, and the buttercream may melt against it.
- Make the frosting. Beat the softened butter until creamy, about 1 to 2 minutes. In a separate bowl, whisk the powdered sugar, cocoa, and salt to break up lumps, then add them to the butter in batches on low speed. Mix in the vanilla and 3 tablespoons of milk. Beat until smooth; add the remaining milk a teaspoon at a time if needed. The frosting should hold soft peaks and spread without sliding.
- Fill and frost. Place one completely cool layer on a serving plate. Spread about one-third of the frosting over the top, then set the second layer on top. Spread the remaining frosting over the top and sides. For neater slices, chill the assembled cake for 20 to 30 minutes before cutting; let slices stand briefly at room temperature for a softer crumb.
Tips for Success
- Measure flour lightly. Fluff it in its container, spoon it into the cup, and level it. Scooping directly can compact the flour and dry out the cake.
- Bring the eggs and milk toward room temperature. They combine more evenly with the oil and dry ingredients. If you forgot, place the eggs in warm—not hot—water for several minutes and gently warm the milk.
- Use parchment circles. Greasing the pans and lining their bottoms makes release more reliable, especially with a tender, moist cake.
- Pour the hot water carefully. Add it gradually while mixing on low so it does not splash. A thin batter is normal.
- Check early, but do not open the oven repeatedly. Begin checking near 30 minutes. Opening the door too often can drop the oven temperature before the cake sets.
- Cool fully before frosting. If time is short, cool the layers on a rack and then refrigerate them uncovered until no longer warm. Do not frost a warm center.
- Use a sharp, clean knife. Wipe the blade between slices for cleaner cuts through the frosting and soft crumb.
Troubleshooting
The cake sank in the middle. It may have been underbaked, the oven door may have opened early, or the leaveners may have been overmeasured. Check the center with a toothpick and confirm your oven temperature with an oven thermometer if sinking happens often. Measure baking powder and soda level, not heaped.
The cake is dry or crumbly. Too much flour or too much baking time is the usual cause. Measure flour by spooning and leveling, and start checking at 30 minutes. If the toothpick is already clean and the edges are pulling away, take the layers out rather than waiting for them to look deeply browned.
The layers stuck to the pans. Let them cool for 10 to 15 minutes, loosen the edges with a thin knife, and invert gently. If they still resist, place the pan back on the rack for a few minutes; a little more cooling can help the cake release. Next time, use parchment on the bottoms as well as greasing the pans.
The frosting is too soft. Beat in more sifted powdered sugar, a few tablespoons at a time, or chill the bowl briefly and beat again. If the butter was melted rather than softened, chilling is especially helpful.
The frosting is too stiff or looks lumpy. Add milk a teaspoon at a time and beat until smooth. Lumps often come from unsifted cocoa or powdered sugar, so whisk those together before adding them to the butter.
The cake tastes less chocolatey than expected. Check that you used unsweetened cocoa rather than a sweetened drink mix, and make sure the cocoa is fresh and aromatic. Hot coffee can intensify the chocolate impression without needing more sugar or cocoa.
Variations
Make it a sheet cake: Bake the batter in a greased and parchment-lined 9-by-13-inch pan at 350°F. Begin checking at about 30 minutes; the exact time depends on the pan and oven. Look for a set center and a toothpick with moist crumbs. Cool fully in the pan before frosting.
Make cupcakes: Divide the batter among lined muffin cups, filling each about two-thirds full. Bake at 350°F for roughly 18 to 22 minutes, checking for springy tops and a toothpick that comes out without wet batter. The yield depends on the size of the cups.
Add a little espresso: Replace the boiling water with an equal amount of hot brewed coffee. This emphasizes the cocoa rather than turning the cake into a coffee-flavored dessert.
Use a different finish: Skip the frosting and dust the cooled cake with powdered sugar, or serve slices with lightly sweetened whipped cream. For a less sweet finish, frost only between the layers and leave the top plain.
Make it dairy-free: Use an unsweetened plant-based milk in place of whole milk and a dairy-free baking stick in place of butter for the frosting. Check that the products are intended for baking; texture and flavor can vary by brand.
What to Serve With It
The cake is rich enough to stand on its own, so small accompaniments work well. Serve it with fresh strawberries or raspberries for a bright, tart contrast, or add a spoonful of unsweetened whipped cream. Vanilla ice cream is a classic choice, especially if the cake is served slightly warm without frosting.
For drinks, coffee, black tea, or a glass of cold milk all pair naturally with chocolate. If serving the cake after a full meal, cut modest slices and offer extra fruit rather than adding another rich dessert.
Make-Ahead, Storage and Reheating
Bake the layers up to a day ahead, cool them completely, and wrap each layer well. Keep them refrigerated if they will not be frosted and served promptly. You can also freeze the unfrosted layers, tightly wrapped, for up to 2 to 3 months for best quality. Thaw wrapped layers in the refrigerator, then bring them close to room temperature before frosting.
Store frosted cake covered in the refrigerator and use within 3 to 4 days. This follows USDA guidance for refrigerated leftovers; keep the cake at 40°F or below and do not leave it at room temperature for more than 2 hours. The frosting firms when cold, so let a slice stand briefly at room temperature before serving. There is no need to microwave a frosted slice; if you want a softer, slightly warm slice, warm an unfrosted piece briefly and add frosting afterward.
For freezing, chill the frosted cake until the frosting is firm, then wrap slices or the whole cake securely and freeze. Use within 2 to 3 months for best texture. Thaw in the refrigerator while still wrapped to limit condensation, then uncover once thawed.
Recipe Card
Servings: 12 to 16 slices
Prep time: 25 minutes
Cook time: 30 to 35 minutes
Total time: About 2 hours 15 minutes, including cooling and frosting
Ingredients
- 1 ¾ cups all-purpose flour
- 1 ¾ cups granulated sugar
- ¾ cup unsweetened cocoa powder
- 1 ½ teaspoons baking powder
- 1 ½ teaspoons baking soda
- 1 teaspoon fine salt
- 2 large eggs
- 1 cup whole milk
- ½ cup vegetable oil
- 2 teaspoons vanilla extract
- 1 cup boiling water or hot brewed coffee
- 1 cup unsalted butter, softened
- 3 cups powdered sugar
- ½ cup unsweetened cocoa powder
- ¼ teaspoon fine salt
- 1 teaspoon vanilla extract
- 3 to 4 tablespoons milk
Instructions
- Heat oven to 350°F. Grease and line two 9-inch round pans with parchment.
- Whisk flour, sugar, cocoa, baking powder, baking soda, and salt in a large bowl.
- Add eggs, milk, oil, and vanilla. Mix just until smooth.
- Slowly whisk in boiling water or coffee. Divide the thin batter between pans.
- Bake 30 to 35 minutes, until the centers spring back and a toothpick shows moist crumbs, not wet batter.
- Cool in pans 10 to 15 minutes, turn out, and cool completely.
- Beat butter creamy. Mix powdered sugar, cocoa, and salt; add in batches. Beat in vanilla and 3 tablespoons milk, adding more as needed.
- Fill between the layers and frost the top and sides. Chill briefly for cleaner slices, if desired.
Frequently Asked Questions
Can I make this cake without a mixer?
Yes. A large bowl and a sturdy whisk are enough for the cake batter. For the frosting, a hand mixer makes it easier to get a light, smooth texture, but a wooden spoon and some patience will work. Let the butter soften well before mixing by hand.
Why is the batter so thin?
The cup of boiling water loosens the cocoa-and-flour mixture. Thin batter is normal for this style of chocolate cake and helps produce a moist crumb. Divide it carefully between the pans rather than adding extra flour.
Can I use hot coffee instead of water?
Yes. Use the same volume of hot brewed coffee. It enhances the chocolate flavor, but the cake should not taste strongly of coffee. Use boiling water if you prefer a straightforward chocolate taste.
Can I bake the cake in one pan?
Yes. A 9-by-13-inch pan is a convenient option. Bake at 350°F and start checking around 30 minutes; the center should spring back and a toothpick should show moist crumbs rather than liquid batter. Cool in the pan before frosting.
Can I make the layers ahead?
Yes. Cool them completely, wrap them well, and refrigerate for up to a day before frosting. For longer storage, freeze the wrapped layers for up to 2 to 3 months for best quality and thaw them in the refrigerator.
How do I know the cake is done?
The center should spring back lightly when touched, the edges should just begin to pull from the pan, and a toothpick inserted in the center should come out with a few moist crumbs. Wet batter means it needs more time; a completely dry toothpick can mean it has baked longer than necessary.
Can I make the cake dairy-free?
Use an unsweetened plant-based milk in the batter and a dairy-free baking stick for the frosting. Since products differ, choose ones made for baking and expect a small change in flavor or texture.
How should I cut clean slices?
Chill the frosted cake for 20 to 30 minutes so the frosting firms slightly. Use a sharp knife, wipe it clean between cuts, and allow slices to sit briefly before serving if you prefer a softer crumb.